
In summary:
- Your smart thermostat’s default settings are costing you money by overworking your HVAC system.
- Mastering concepts like temperature differential, C-wire power, and sensor placement is key to unlocking real savings.
- Choosing between scheduled programming and geofencing depends entirely on your household’s routine and predictability.
- Integrating your thermostat into a larger smart home ecosystem provides the highest level of energy optimization.
You invested in a smart thermostat like a Nest or Ecobee, expecting your heating bills to drop. Yet, you find yourself manually adjusting it, just like your old mercury dial, and the promised savings never materialize. This is a common frustration for homeowners who discover that owning a “smart” device isn’t the same as using it smartly. The standard advice to simply “set a schedule” often overlooks the deeper mechanical and technical nuances that govern true energy efficiency.
The problem isn’t the thermostat; it’s the approach. Treating it as a simple on/off switch ignores the complex interplay between your home’s insulation, your HVAC system’s mechanics, and your family’s unique lifestyle. True optimization and the advertised 15% savings don’t come from a basic schedule. They come from understanding the “why” behind the settings: why a narrow temperature band stresses your furnace, how a missing C-wire starves your device of power, and when sensor data is more valuable than a rigid program.
This guide moves beyond the basics. We will deconstruct the core principles of smart thermostat operation, transforming you from a passive user into an active system optimizer. We’ll cover the critical technical checks, compare the leading technologies for different home layouts, explore advanced programming strategies, and finally, show you how to build a truly intelligent and responsive home energy ecosystem.
This comprehensive article breaks down the essential steps and considerations for maximizing your smart thermostat’s potential. Explore the sections below to master each aspect, from fundamental mechanics to advanced smart home integration.
Contents: How to Master Your Smart Thermostat for Maximum Savings
- Why a Tight Temperature Band Cycles Your Furnace Too Often?
- How to Install a Smart Thermostat Without an Existing C-Wire?
- Nest Learning or Ecobee with Sensors: Which is Better for Two-Story Homes?
- The Voltage Mistake That Fries Smart Thermostats in Old Homes
- When to Use Geofencing vs. Scheduled Programming?
- When to Adjust Your Thermostat to Trigger Natural Drowsiness?
- When to Upgrade Your Boiler for Maximum Carbon Savings?
- How to Build a Smart Home Hub That Connects Different Brands?
Why a Tight Temperature Band Cycles Your Furnace Too Often?
One of the most common mistakes new smart thermostat owners make is setting an extremely narrow temperature band, often called the “temperature differential” or “swing.” You might set your heat to 20°C and want it to turn on the second it hits 19.9°C. While this seems precise, it forces your HVAC system into a state of “short cycling”—turning on and off rapidly. This is not only inefficient but also destructive to your equipment. Each time a furnace or heat pump starts, it puts immense strain on its components.
Constant on/off cycling subjects the compressor to intense pressure and heat fluctuations. The contactors and capacitors endure powerful electrical surges with every startup, causing them to fail far sooner than their designed lifespan. This premature wear can lead to catastrophic failures, where a compressor replacement from short cycling often costs thousands of dollars, completely negating any energy savings. An ideal system should run in longer, less frequent cycles, typically aiming for 3-4 cycles per hour at most during moderate weather.
To fix this, you need to widen the temperature differential in your thermostat’s advanced settings. Most manufacturers recommend a starting point of 0.5°C to 1°C (1-2°F). This means if you set your heat to 20°C, the furnace won’t kick on until the temperature drops to 19°C. This allows the system to run for a solid period to heat the space efficiently before shutting down for a longer rest, saving both energy and mechanical wear.
How to Install a Smart Thermostat Without an Existing C-Wire?
You’ve unboxed your new smart thermostat, ready to start saving money, only to discover your existing wiring is missing the “C-wire” or “common wire.” This wire provides a continuous 24V power source required for features like a Wi-Fi connection and a backlit screen. Without it, the thermostat may try to “steal” power from other wires, leading to unstable performance or even damaging your HVAC control board. But a missing C-wire isn’t a deal-breaker; you have several reliable solutions.
Before attempting any of these, your first and most important step is to turn off all power to your HVAC system at the breaker. The image below shows the typical wiring you’ll be working with. Taking a clear picture of your old thermostat’s wiring before you disconnect anything is a critical reference step.
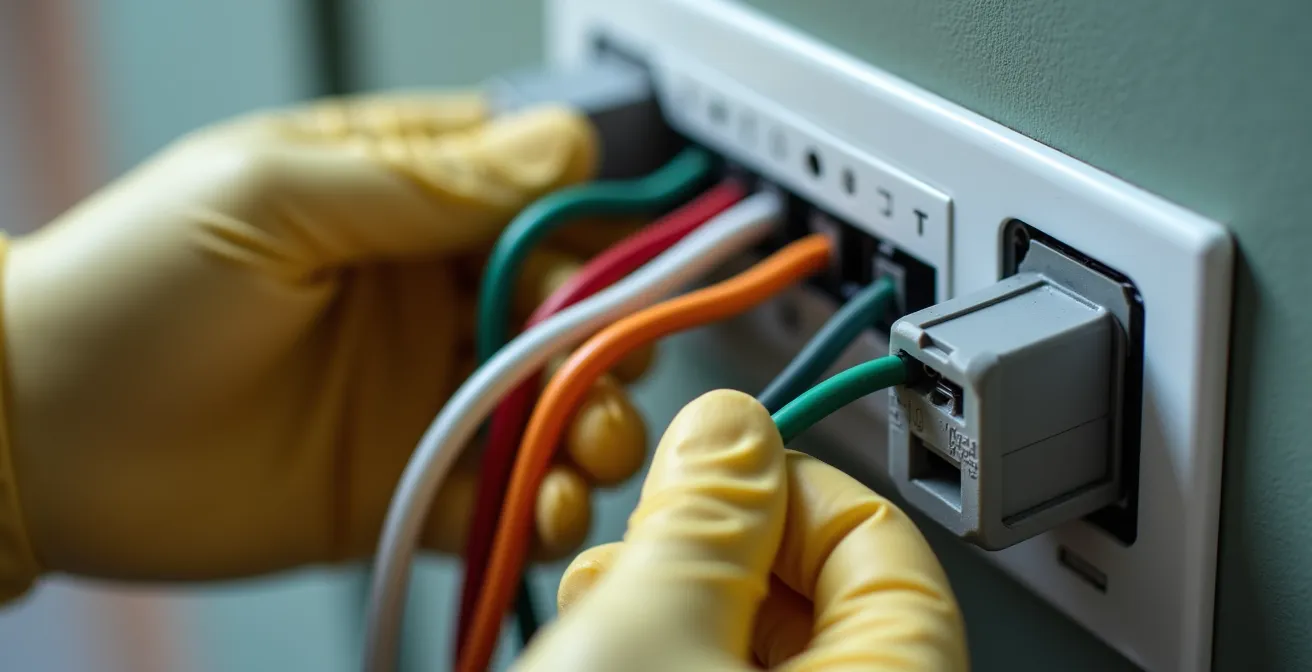
With the power off, you can explore your options. Many smart thermostats come with a C-wire adapter or power extender kit. This small device is installed at your furnace’s control board and uses the existing wires to create a dedicated power circuit for the thermostat. This is often the most recommended solution. However, other options exist depending on your system and comfort level with electrical work. The goal is to provide that stable power source to unlock the full potential of your device, because according to the Department of Energy, you can save as much as 10% a year on heating and cooling by using one properly.
Here are the common alternatives for powering your thermostat:
- Use a C-wire Adapter Kit: This is the most common solution, involving installing a small module at your furnace control board.
- Repurpose the G-wire: The “G” wire controls the fan. You can repurpose it as a C-wire, but you will lose the ability to run the fan independently of heating or cooling.
- Use a Power Extender Kit: Included with some thermostats (like Ecobee), this kit cleverly reconfigures your existing four wires to deliver power.
- Run a New Cable: This is the most invasive option, but it provides a dedicated, future-proof solution by running a new 5-wire or 8-wire cable from the furnace to the thermostat.
Nest Learning or Ecobee with Sensors: Which is Better for Two-Story Homes?
The choice between the two titans of the smart thermostat world, Nest and Ecobee, often comes down to one key factor: your home’s layout. For a single-story apartment or a small, open-plan house, the Nest Learning Thermostat’s single-point sensing and powerful learning algorithm are often sufficient. It learns your patterns and builds a schedule for you. However, in a two-story home, this single sensor becomes a significant liability. The thermostat, usually located in a central hallway, can’t possibly know that your upstairs bedroom is 5 degrees warmer than the living room it’s measuring.
This is where the Ecobee, with its included remote sensors, fundamentally excels. By placing sensors in key rooms—like the master bedroom, the nursery, or a home office—the thermostat gets a holistic view of the home’s temperature. You can then tell the Ecobee to average the temperatures across all sensors or, more powerfully, to prioritize the temperature only in occupied rooms. This means it won’t waste energy cooling an empty downstairs living room in the middle of the night; it will focus solely on keeping your bedroom comfortable. This multi-zone management is the key to both comfort and efficiency in larger, multi-level homes.
This table breaks down the core differences, highlighting why Ecobee’s sensor-based approach often yields greater savings in complex environments.
| Feature | Nest Learning | Ecobee |
|---|---|---|
| Annual Heating Savings | 10-12% | Up to 23% |
| Annual Cooling Savings | 15% | Up to 23% |
| Estimated Dollar Savings | $131-$145 per year | Up to 26% on HVAC costs |
| Remote Sensors | No (requires 3rd party) | Yes (included) |
| Learning Algorithm | Yes | Optional with Eco+ |
| Best For | Single-point control | Multi-zone management |
The Voltage Mistake That Fries Smart Thermostats in Old Homes
Before you even think about connecting that shiny new smart thermostat in an older home, there is one critical check you must perform: determining your system’s voltage. Most modern smart thermostats (like Nest and Ecobee) are designed exclusively for low-voltage (24V) systems, which are standard in homes with central furnaces and air conditioners. However, many older homes, especially those with electric baseboard heaters or radiant systems, use line-voltage (120V or 240V) systems. Connecting a low-voltage thermostat to a line-voltage system will instantly destroy the device’s circuitry and could pose a serious fire hazard.
This is not a rare issue. In fact, incorrect HVAC installation and configuration are alarmingly common; some studies show that as many as 90% of systems may have some form of installation error impacting efficiency or safety. Identifying your system type is a non-negotiable safety step. Line-voltage systems can often be identified by their much thicker thermostat wires and the absence of a central furnace control board. However, the only certain method is to use a multimeter to test the voltage at the thermostat wires (with the power on, carefully). If you are not comfortable doing this, hire an electrician. It’s a small price to pay to avoid a fried thermostat and a potential electrical fire.
If you confirm you have a line-voltage system, you are not out of luck. Several companies, such as Mysa and Stelpro, manufacture smart thermostats specifically designed for 120V/240V electric heat. You just need to purchase the right product for the job.
Action Plan: Voltage Safety Checklist for Smart Thermostat Installation
- Power Off: Turn off power at the main breaker before touching any wires. This is the most crucial safety step.
- Identify System Type: Look for signs of your heating system. Electric baseboard heaters or wall convectors are strong indicators of a line-voltage system.
- Test with a Multimeter: With extreme caution, test the voltage between the R (red) wire and the other wires. A reading around 24V indicates a low-voltage system, while 120V or 240V confirms line voltage.
- Inspect Wire Gauge: Compare your wires to a standard phone charger cable. Line-voltage wiring is significantly thicker and more rigid than the thin 18-gauge wires used for 24V systems.
- Confirm and Purchase: If line voltage is confirmed, do not proceed with a standard smart thermostat. Purchase a model specifically rated for line-voltage (120V/240V) applications.
When to Use Geofencing vs. Scheduled Programming?
Your smart thermostat offers two primary methods for automation: a fixed schedule and dynamic geofencing. Choosing the right one is essential for maximizing savings and depends entirely on the predictability of your household’s routine. A fixed schedule is ideal for individuals or families with a highly consistent daily life—leaving for work at 8 AM, returning at 6 PM, and going to bed at 10 PM every weekday. You can program the thermostat to enter an energy-saving “Away” mode during those predictable empty-house hours.
However, for the vast majority of modern households with variable work schedules, kids’ activities, and spontaneous outings, a rigid schedule is inefficient. It will waste energy heating or cooling an empty house if you decide to stay out late, or it will leave you coming home to an uncomfortable environment if you arrive early. This is where geofencing becomes the superior strategy. Geofencing uses your smartphone’s GPS to create a virtual perimeter around your home.

As detailed in many smart home guides, when the last person’s phone leaves this designated area, the thermostat automatically switches to its energy-saving mode. When the first person’s phone re-enters the perimeter, it automatically returns to the comfortable “Home” setting. This automation is based on real-time occupancy, not a guess about your schedule. It adapts perfectly to unpredictable lives, ensuring you never waste money on an empty home and always return to a comfortable one. For most users, a hybrid approach works best: a basic schedule for sleep times combined with geofencing for daytime “Away” periods.
When to Adjust Your Thermostat to Trigger Natural Drowsiness?
A smart thermostat’s utility extends beyond just saving money; it can also be a powerful tool for improving your sleep quality. Your body’s internal clock, or circadian rhythm, is highly sensitive to temperature. A slight drop in core body temperature is one of the key physiological signals that tells your brain it’s time to sleep. You can leverage your thermostat to automate this process and encourage natural drowsiness.
Instead of keeping the temperature static until you get into bed, you should program a gradual temperature decline starting 60-90 minutes before your scheduled bedtime. For instance, if the Department of Energy recommends setting the thermostat to around 68°F (20°C) while you’re awake, you can program it to drop to a sleep temperature of 65°F (18°C) over the hour before you turn in. This slow, steady drop mimics the natural sunset temperature change and helps initiate the sleep process.
The inverse is true for waking up. Being jolted awake in a cold room can be unpleasant. Program your thermostat to begin a gradual warm-up about 30-45 minutes before your alarm is set to go off. This ensures you wake up in a comfortable environment, making the start to your day more pleasant. Many thermostats, like the Ecobee, also monitor humidity. Maintaining a relative humidity between 30% and 50% is also crucial for respiratory comfort during sleep, and the thermostat can adjust its run times to help manage this. This level of fine-tuning is where a smart thermostat goes from a convenience to a wellness tool.
Key Takeaways
- Short cycling from a tight temperature band causes expensive HVAC damage, negating energy savings. Widen your temperature differential to at least 1°C (2°F).
- For multi-story homes, Ecobee’s remote sensors provide superior comfort and efficiency over Nest’s single-point learning by targeting occupied rooms.
- Always verify your system voltage before installation. Connecting a standard 24V smart thermostat to a 120V/240V line-voltage system will destroy the device.
When to Upgrade Your Boiler for Maximum Carbon Savings?
Your smart thermostat is more than just a control panel; it’s a powerful data-gathering tool. By analyzing its own usage data—such as furnace run times, cycle frequency, and how long it takes to heat your home—it can help you decide when a major system upgrade, like replacing your boiler or furnace, is economically justified. If you’ve optimized all your settings and your home is well-insulated, but the thermostat data shows the furnace is still running for many hours a day, it’s a clear sign the unit itself is inefficient.
Heating and cooling are the largest energy expenses in most homes. In fact, according to Energy Star, the average U.S. household spends over $900 per year on it. An old, inefficient boiler might be operating at 60-70% efficiency (AFUE), meaning 30-40% of the fuel you pay for is wasted. A new high-efficiency condensing boiler can operate at over 95% efficiency. The data from your smart thermostat can help you calculate a return on investment (ROI) for an upgrade. For example, if you know your furnace runs 8 hours a day in winter, you can calculate the potential savings from a 30% efficiency gain.
Furthermore, advanced software like Ecobee’s Eco+ will actively learn your home’s thermal properties and can even factor in time-of-use electricity rates to run the system when energy is cheapest. This data-driven approach removes the guesswork from major capital decisions. When your thermostat’s reports consistently show long runtimes despite best practices, it’s no longer a question of *if* you should upgrade, but *when*. The thermostat provides the evidence needed to make a sound financial and environmental decision.
How to Build a Smart Home Hub That Connects Different Brands?
Your smart thermostat is the cornerstone of a smart home, but its true power is unleashed when it communicates with other devices. The ultimate goal is to create a home that responds automatically to its environment and your presence. This requires a central smart home hub or platform that can bridge the communication gap between different brands and protocols like Wi-Fi, Zigbee, and Z-Wave. Platforms like Home Assistant, Hubitat, or Samsung SmartThings serve as the “brain” of your home.
The first step is to choose a hub that supports the new Matter protocol. Matter is a universal connectivity standard designed to make devices from different companies (like Google, Apple, and Amazon) work together seamlessly. Starting with a Matter-compatible hub ensures your system is future-proof. From there, you can begin building automations that create significant energy savings beyond what the thermostat can do alone. For example, you can integrate your thermostat with smart blinds.
An automation can be set up to automatically close the blinds on sun-facing windows during the hottest part of a summer afternoon, significantly reducing solar heat gain and easing the load on your air conditioner. In winter, the opposite automation can open the blinds to let in passive solar heat. By linking your thermostat to local weather forecasts, the hub can pre-cool your home before a heatwave hits or pre-heat it before a cold snap, often during off-peak energy hours when rates are lower. This level of system integration is where you move from simple programming to creating a truly intelligent, efficient, and responsive home ecosystem.
Here are key steps to integrating your system:
- Choose a Matter-Compatible Hub: Start with a platform like Home Assistant or SmartThings to ensure future compatibility.
- Integrate Smart Blinds/Shades: Create automations to block summer sun and allow winter sun, reducing HVAC load.
- Use Weather-Based Automations: Link to a weather service to pre-adjust your home’s temperature based on forecasts, optimizing for efficiency.
- Link Smart Plugs: Control auxiliary devices like space heaters or window AC units within the same ecosystem, ensuring they don’t fight against your central system.
- Configure Voice Control: Connect your hub to Alexa, Google Assistant, or Siri for easy manual overrides and system-wide commands.
By moving beyond default settings and actively optimizing your smart thermostat as part of a larger home system, you can finally take control of your energy consumption and unlock the significant savings you were promised.