Securing a National Park reservation isn’t about being the fastest clicker; it’s about understanding and respecting the park’s carrying capacity.
- Overcrowding actively degrades the natural environment and the visitor experience, making controlled access essential.
- Proactive planning for crowds, extreme weather, and wildlife encounters is a non-negotiable part of modern park visits.
Recommendation: Shift your mindset from simply “getting in” to “visiting responsibly” by adopting the comprehensive strategies outlined in this guide.
The “Reservations Full” banner on the Yosemite National Park website can feel like a digital slap in the face. For many nature enthusiasts, planning a summer trip to America’s treasured landscapes has transformed from a joyful dream into a high-stress, refresh-button-mashing competition. The common advice is predictable: be online the second reservations open, have multiple devices ready, and hope for the best. But this frantic scramble overlooks a fundamental truth about the modern National Park experience.
This isn’t just a Yosemite problem. It’s the reality at Zion, Arches, Glacier, and a growing list of other natural jewels. The challenge isn’t a flaw in the system; the system itself is a necessary response to an unprecedented challenge: protecting fragile ecosystems and the quality of the visitor experience from overwhelming crowds. As a Park Ranger, I see the consequences of over-visitation daily, from trail erosion to dangerous human-wildlife encounters.
But what if the key wasn’t just about *how* to book, but *why* these systems exist in the first place? This guide moves beyond the simple logistics of securing a pass. It’s about adopting a mindset of mindful planning and responsible park stewardship. By understanding the unique pressures on each park, you not only increase your chances of a successful visit but also become a partner in our conservation mission. This is the difference between being a tourist and being a true park advocate.
This article will deconstruct the specific challenges of several iconic parks to build a holistic strategy. We will explore how to navigate crowds, pack for extreme environments, make smart financial choices, and safely coexist with wildlife. By the end, you will have the tools not just to visit, but to experience these parks as they are meant to be: with respect, preparation, and a deep appreciation for their preservation.
Summary: A Ranger’s Comprehensive Guide to Navigating Popular National Parks
- Why Arriving After 9 AM at Zion National Park Ruins Your Experience?
- How to Pack for the Grand Canyon: The Difference Between Rim and Floor Hiking?
- Annual Pass vs. Daily Fees: Which Saves Money on a 3-Park Road Trip?
- The Photo Mistake That Puts You in Danger with Bison at Yellowstone
- When to Visit Acadia National Park to Catch Fall Foliage at Its Peak?
- Why Burying Waste 6 Inches Deep is Crucial for Soil Health?
- State Park or National Park: Which Protects Local Heritage More Effectively?
- How to Apply “Leave No Trace” When Camping in Areas Without Facilities?
Why Arriving After 9 AM at Zion National Park Ruins Your Experience?
Arriving at Zion after 9 AM fundamentally ruins your experience because you spend more time dealing with logistics than enjoying the park’s majesty. By mid-morning, the Visitor Center parking lots are full, forcing you into a stressful search for paid parking in the town of Springdale. This is followed by long, sun-baked queues for the mandatory canyon shuttle, which is your only access to iconic trailheads like The Narrows and Emerald Pools. This isn’t an exaggeration; it’s a predictable outcome of the park’s immense popularity and limited visitor carrying capacity.
The sheer volume of visitors is staggering. To manage the traffic and environmental impact in the narrow canyon, the park implemented its shuttle system in 2000. The system’s success in preserving the canyon’s tranquility is also a measure of its demand; the park recently celebrated 90 million shuttle boardings since 2000. This number illustrates a critical point: you are not just competing for a parking spot, but for a place in a massive, moving queue. An early start is not a suggestion; it is the only strategy for a serene visit.
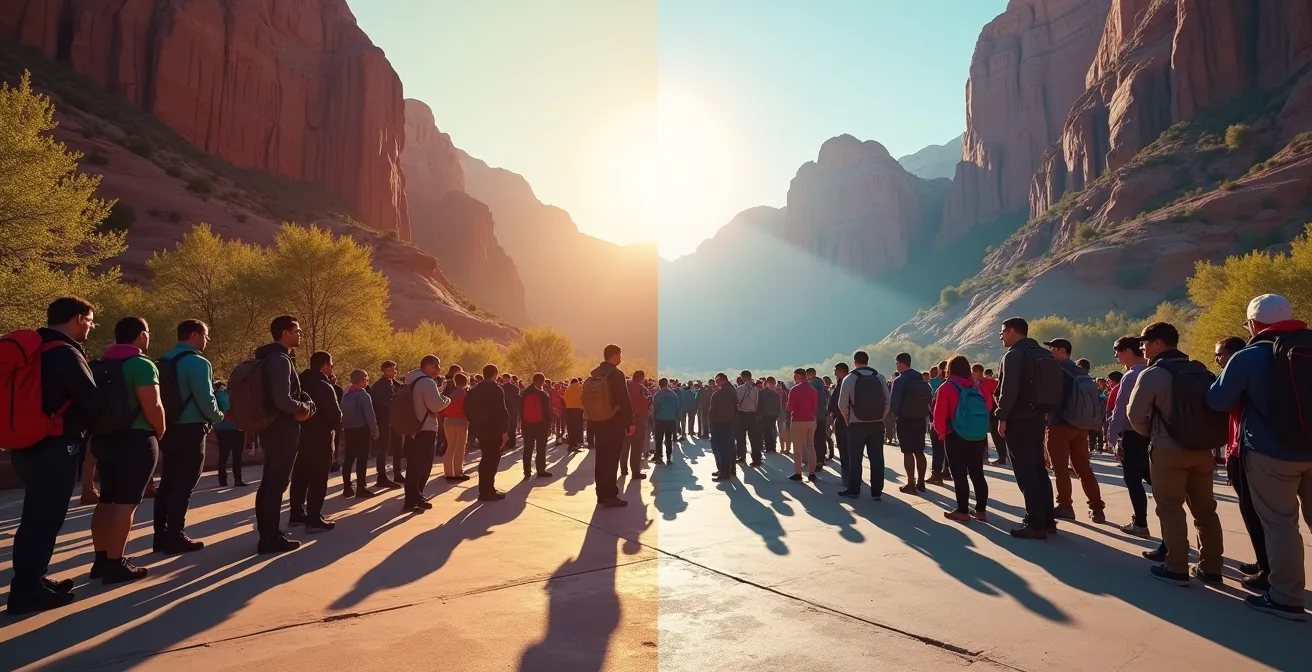
The visual contrast between an early and late start is stark. Early visitors enjoy cool temperatures, soft light, and the quiet sounds of the Virgin River. Those arriving later face higher temperatures, harsh sun, and the constant noise of a crowd. This difference profoundly impacts your ability to connect with the natural environment. To truly experience Zion, your planning must revolve around avoiding the 9 AM to 3 PM peak congestion window.
Action Plan: Beating the Zion Morning Crush
- Arrive at the park entrance before 7 AM when the first shuttles typically begin operating.
- If the Visitor Center parking is full (often by 8 AM), proceed directly to paid public lots in Springdale to save time.
- Utilize the free Springdale Line shuttle, which runs through town, as a reliable backup to get to the park’s pedestrian entrance.
- Plan your primary hikes for the earliest shuttle departures to get ahead of the crowds on the trail.
- Monitor the official Zion National Park “Current Conditions” webpage for real-time updates on parking and shuttle status.
How to Pack for the Grand Canyon: The Difference Between Rim and Floor Hiking?
Packing for the Grand Canyon requires two completely different strategies depending on one simple variable: your elevation. The primary difference between hiking the Rim Trail and descending to the canyon floor is the dramatic temperature and exposure gradient. The canyon floor can be significantly hotter than the rim, with an average temperature increase of over 25°F (14°C). This means a pleasant 75°F (24°C) day on the South Rim could be a dangerous 100°F+ (38°C+) inferno at Phantom Ranch.
A rim hike is a relatively straightforward high-altitude walk. You can often get by with standard trail runners, a couple of liters of water, and basic sun protection. Descending below the rim, even for a short distance, is a serious athletic endeavor that demands specific gear. The return trip is a steep, strenuous climb in increasing heat with no shade. Underestimating the gear requirements for a “day hike” into the canyon is one of the most common and dangerous mistakes visitors make, leading to hundreds of heat-related rescue incidents each year.
The following table, based on information from official park partners, starkly illustrates the difference in preparation required. A failure to respect these distinctions doesn’t just lead to discomfort; it can lead to severe dehydration, heat stroke, and the need for emergency extraction. As park concessioner resources like those provided by Grand Canyon Lodges show, preparation is paramount.
| Gear Category | Rim Hiking | Canyon Floor Hiking |
|---|---|---|
| Water Requirements | 2 liters minimum | 4-6 liters minimum |
| Temperature Range | 30-80°F seasonal | 38-120°F seasonal |
| Sun Protection | Standard SPF 30 | SPF 50+, long sleeves mandatory |
| Emergency Gear | Basic first aid | Full kit with electrolytes, emergency shelter |
| Footwear | Trail runners acceptable | Sturdy boots with ankle support required |
Ultimately, your pack must match your plan. For the rim, you pack for a mountain hike. For the floor, you pack for a desert expedition. There is no middle ground.
Annual Pass vs. Daily Fees: Which Saves Money on a 3-Park Road Trip?
For a road trip involving three or more National Parks, the annual pass is almost always the more economical choice. The math is simple. Most major parks like Yosemite, Grand Canyon, and Zion charge a per-vehicle entrance fee of around $35, valid for seven days. A three-park trip would therefore cost approximately $105 in daily fees. The $80 America the Beautiful pass grants unlimited access to all National Parks and over 2,000 other federal recreation sites for a full year.
The breakeven point is reached on your third park visit. Any park you visit after that is essentially free. This makes the pass an obvious investment for any multi-park itinerary or for individuals who plan to visit even a single park more than twice in a year. The pass covers the pass holder and all passengers in a personal vehicle, making it highly valuable for families and groups.
Beyond the direct savings, the annual pass encourages a different style of exploration. It incentivizes you to visit smaller, lesser-known National Monuments or Federal Recreation Areas you might otherwise skip on your route between major parks. Maximizing the value of your pass means thinking beyond the big names. To get the most out of this investment, consider these strategies:
- Purchase the pass at the entrance of your first park to start your savings immediately.
- Plan multiple shorter visits to parks near your home base throughout the year instead of one marathon trip.
- Incorporate lesser-known federal sites like National Monuments or Wildlife Refuges into your road trip itinerary for added value.
- The pass admits the pass owner and all passengers in a single, non-commercial vehicle. A second pass holder can be named on the pass, but only one is needed for entry.
- Time your purchase strategically, as the pass is valid for 12 months from the month of purchase, not the calendar year.
The Photo Mistake That Puts You in Danger with Bison at Yellowstone
The single most dangerous photo mistake in Yellowstone is treating wildlife like a theme park attraction by getting too close for a picture. Visitors consistently underestimate the speed and power of bison, often approaching them for a selfie or a close-up shot, believing their calm grazing behavior indicates they are docile. This is a grave error. You must maintain a minimum distance of 25 yards (23 meters) from bison and elk at all times. For predators like bears and wolves, that distance increases to 100 yards (91 meters).
These are not suggestions; they are regulations designed for your safety and the animal’s well-being. A bison can become agitated in an instant, and its seemingly slow demeanor is deceptive. The National Park Service explicitly warns visitors of this danger. As their official safety guidelines state:
Bison can run three times faster than humans and have injured more people in Yellowstone than any other animal.
– National Park Service, Yellowstone Wildlife Safety Guidelines
This fact underscores the foolishness of approaching these powerful animals. The “perfect shot” is not worth a trip to the hospital or worse. Responsible wildlife photography relies on distance and the right equipment. Use a telephoto lens to capture your image from a safe and respectful distance. This not only protects you but also prevents stressing the animal, which can alter its natural behavior.
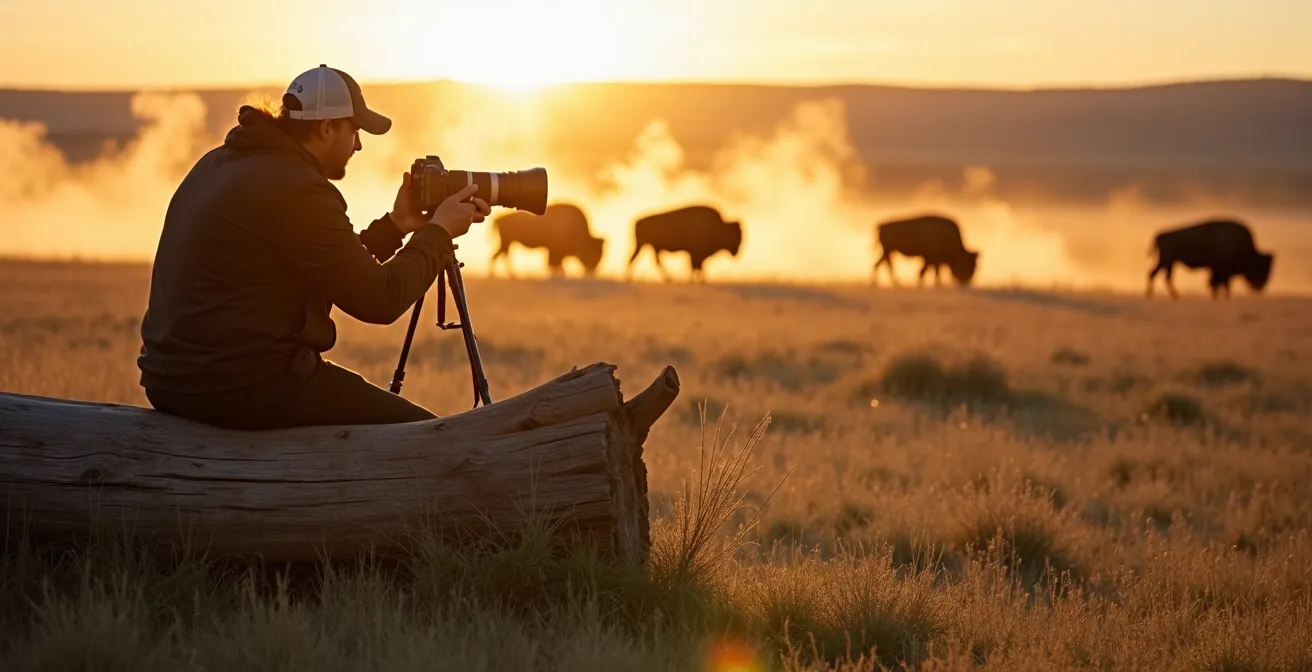
The image of a photographer using a long lens, with a natural barrier between them and the herd, is the model to emulate. It demonstrates respect for the wildlife’s space and an understanding that we are visitors in their home. Your camera’s zoom is your tool for safety, not your feet.
When to Visit Acadia National Park to Catch Fall Foliage at Its Peak?
Timing a visit to Acadia National Park for peak fall foliage is a delicate balance of science and luck, but the most reliable window is generally the first two to three weeks of October. While this is the historical sweet spot, the exact timing and intensity of the color change are dictated by annual weather patterns. The ideal conditions for vibrant autumn colors are a series of warm, sunny days followed by cool, but not freezing, nights.
Unlike booking a hotel, you cannot set a firm date months in advance and guarantee peak colors. A “peak” can last for a week or be fleeting, washed out by a single storm. Therefore, a successful foliage trip requires flexibility. The best strategy is to plan your travel for the general early-to-mid-October timeframe and then closely monitor regional “fall foliage trackers” in the weeks leading up to your visit. Websites like Maine’s official tourism site provide weekly updated maps showing color progression across the state.
Several factors influence the display. Elevation plays a role, with colors often appearing on Cadillac Mountain’s summit before they do at sea level. The types of trees are also key; the brilliant reds of maples, golden yellows of birches, and deep oranges of oaks all peak at slightly different times, creating a rolling wave of color across the island. A flexible itinerary that allows you to explore different parts of Mount Desert Island will maximize your chances of witnessing a spectacular display, even if one specific area is slightly past its prime.
Why Burying Waste 6 Inches Deep is Crucial for Soil Health?
Burying human waste in a cathole 6 to 8 inches (15 to 20 cm) deep is a critical practice for protecting water sources and soil health, and it’s rooted in basic biology. This specific depth is not arbitrary. It places the waste squarely in the topsoil’s most microbially active layer. This is where decomposition happens fastest, thanks to a high concentration of organic matter, oxygen, and microorganisms that work to break down the waste and neutralize pathogens.
If you dig too shallow, the waste may not be sufficiently covered. This can attract wildlife, leading them to dig it up, which spreads pathogens and creates an unsanitary environment for other visitors. It also fails to contain odors. Conversely, if you dig too deep—below 8 inches—you enter a realm of soil with significantly less oxygen and microbial life. In this near-anaerobic environment, decomposition slows dramatically, effectively preserving the waste and its harmful bacteria for a much longer period.
This practice is a core tenet of the “Dispose of Waste Properly” principle within the Leave No Trace framework. The goal is to maximize decomposition and minimize impact. It’s also vital to locate your cathole at least 200 feet (about 70 adult steps) away from any water source, campsite, or trail. This buffer prevents fecal bacteria from contaminating water through runoff and keeps high-traffic areas clean and safe for everyone. In essence, digging a proper cathole is a small act of sanitation that has a huge impact on the long-term health of a backcountry ecosystem.
State Park or National Park: Which Protects Local Heritage More Effectively?
Both State and National Parks are vital for conservation, but they operate with different mandates that determine which type of heritage they protect more effectively. National Parks are designated to preserve natural and historical treasures of outstanding national significance, while State Parks primarily protect resources and provide recreation of statewide or regional importance. Neither is “better”; they simply have different, complementary missions.
A National Park like the Grand Canyon or Yellowstone protects a landscape so unique and monumental that it is considered a heritage asset for the entire country, and indeed the world. The management focus, directed by federal legislation, is heavily weighted towards preservation, often limiting certain recreational activities to protect the resource’s integrity for future generations. This federal oversight ensures a uniform standard of protection for assets deemed to be part of the collective American identity.
A State Park, on the other hand, might protect a beautiful local lake, a specific forest ecosystem important to the state’s ecology, or a historic site relevant to the state’s own history. Their management is often more focused on balancing conservation with public recreation—providing boat launches, swimming areas, and extensive trail networks for local communities. In this sense, State Parks are arguably more effective at protecting “local heritage,” as their entire mission is tailored to the specific natural and cultural assets that define a particular state or region, making them more accessible and relevant to the daily lives of residents.
Key Takeaways
- Responsible park visitation begins with planning, which is now a fundamental act of conservation, not just logistics.
- Every major park presents unique challenges—be it crowds at Zion, extreme temperatures at the Grand Canyon, or wildlife at Yellowstone—that require specific preparation.
- The “Leave No Trace” ethic is the unifying philosophy that connects pre-trip planning, on-site behavior, and our shared goal of preserving these spaces.
How to Apply “Leave No Trace” When Camping in Areas Without Facilities?
Applying “Leave No Trace” principles when camping in undeveloped areas is the ultimate expression of responsible park stewardship. It moves beyond following rules to embracing an ethic of minimizing your impact footprint at every step. This philosophy is built on seven core principles that provide a framework for making sound decisions in the backcountry. For a visitor planning a trip to a place like Yosemite, the very first principle is the most relevant: Plan Ahead and Prepare.
This principle directly connects to the reservation systems we’ve discussed. Securing a reservation is not just a bureaucratic hurdle; it is the first act of “Leave No Trace.” It ensures you are visiting within the park’s carrying capacity, which prevents overcrowding that leads to trail erosion, vegetation damage, and wildlife disturbance. A well-prepared visitor knows the regulations, has the right gear, and understands the potential risks, which reduces the likelihood of needing a rescue or making a poor decision in the wild.
The seven principles provide a complete guide to low-impact outdoor recreation:
- Plan Ahead and Prepare: Know the regulations, get reservations, and pack for extreme conditions.
- Travel and Camp on Durable Surfaces: Stick to established trails and campsites to avoid trampling fragile vegetation.
- Dispose of Waste Properly: Pack it in, pack it out. This includes all food scraps. Bury human waste in catholes 6-8 inches deep and 200 feet from water.
- Leave What You Find: Let others enjoy the beauty. Leave rocks, plants, and other natural objects as you find them.
- Minimize Campfire Impacts: Use a lightweight stove for cooking. If you must have a fire, use established fire rings and make sure it’s completely out.
- Respect Wildlife: Observe from a distance. Never feed animals. Store your food securely.
- Be Considerate of Other Visitors: Respect the solitude others seek. Keep noise levels down and yield to others on the trail.
Embracing these principles transforms your relationship with the outdoors. It shifts the focus from what you can get out of the park to how you can help protect it. This is the mindset of a true conservationist.
Your next adventure is an opportunity to practice this deeper form of respect. By adopting a ranger’s mindset—planning meticulously, understanding the environment, and prioritizing conservation—you become an active partner in protecting these irreplaceable landscapes for generations to come. Start applying these strategies today for your next park visit.